When I first got into Eurorack, the Make Noise Morphagene was one of those modules that seemingly everyone had. The most inspiring patches usually involved the Morphagene in one way or another and it’s no surprise as to why. It can be used in many ways but what always spoke to me the most, is it’s ability to take pre-recorded material and warp and mangle it using the knobs and the CV (Control Voltage) inputs. This pre-recorded material could be anything from field recordings, past jams, various cool sounds, percussive loops, human speech, sections from songs, etc.
In order to create your own, you’ll need a DAW that can export at a sample rate of 48,000 kbps and a bit depth of 32-bit Floating Point. The ability to store metadata within the file for Splice markers is also preferred but not 100% necessary. I chose to use Logic Pro X (10.4) for this purpose. You’ll also need a way to write to a Micro SD if you plan on using them with your own Morphagene. I use this adapter.
I happened to have several hours worth of recorded Eurorack jams on hand so I figured that would be a good place to start. I picked about 10 of the shortest ones and the cultivated from there. I tried to pick the pieces with enough variation to keep it interesting, yet have a very defined mood and tone throughout. From past experience with the Morphagene, it seemed like shorter Splices yielded better results so I tried to keep them fairly short. In longer sections that sounded great as a whole, I’d add cuts throughout, but I’d keep both parts beside each other. Any section that seemed redundant or that just wasn’t very interesting got axed. All of these edits are good because they’ll eventually act as Splice markers later on.
After you reach a point where you’re happy with your edits. Highlight the Regions and select “Create Markers From Regions.” These markers will be stored as metadata and the Morphagene will interpret them as Splice markers.


From here, there are three paths which you can take that essentially accomplish the same goal:
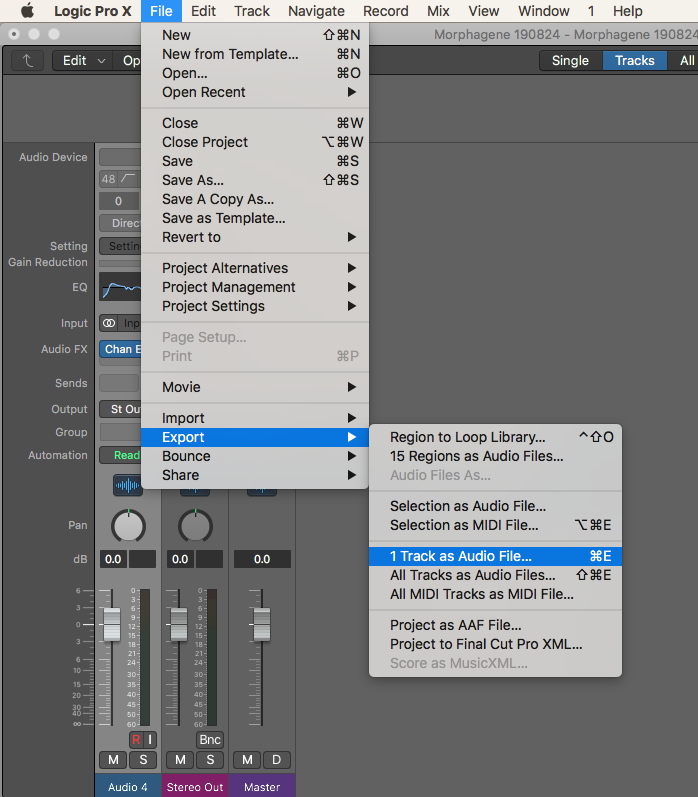
Option 1: Export Track as Audio File
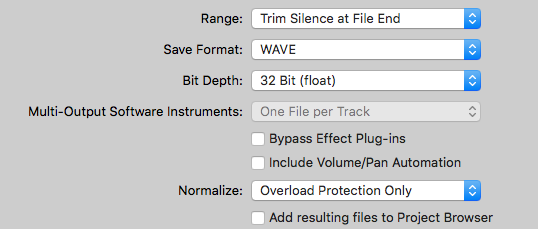
If you choose this option, make sure you have “Trim Silence at File End” selected or else your file will be the entire length of your Project. You could always drag the Project End marker to the where your audio ends as well.
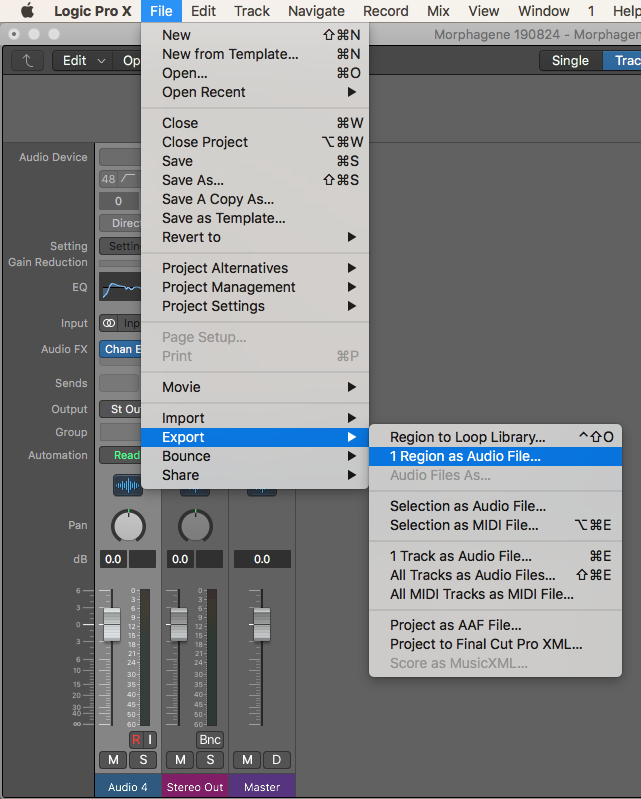
Option 2: Export Region as Audio File
I originally tried to use export using this method but for some reason Logic wouldn’t let me select WAVE with 32-bit Float, it only gave me the option for AIFF. Probably just a bug. When I tried later, after using Option 1, it allowed me to select WAVE now. That could be the possible work-around.
To use this method, highlight all the Regions you wish to use. Select “Join” to create one large Region.
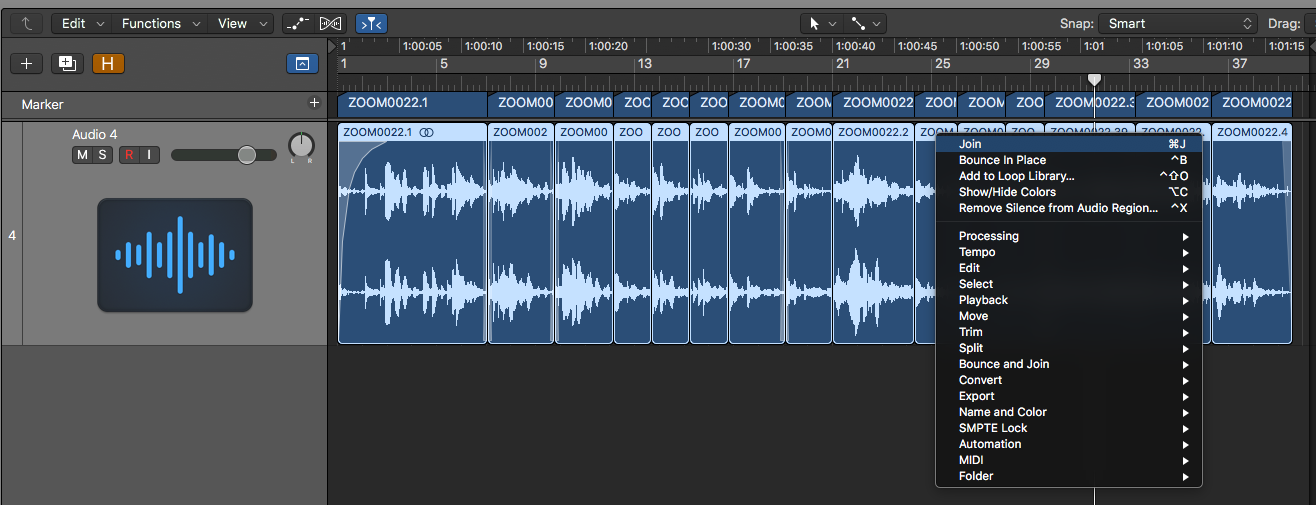
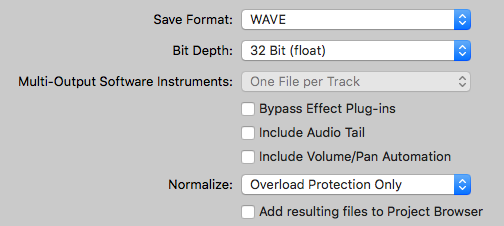
Option 3: Bounce Highlighted Area
In my mind, this is the easiest way and I will continue doing it this way in the future. Just highlight the Regions you wish to Bounce and hit ⌘B (command+B).
You can choose whatever of the options above. They all export at the required quality and store metadata for the Splice markers. Just make sure that you match the settings in the pictures above before exporting.
I keep a folder specifically for Morphagene Reels and audio that can be used for Reels in the future.
Make sure you rename the files "mg1.wav", "mg2.wav", etc. before loading them onto the Micro SD. If you pass 9, switch the naming convention to “mga.wav”, “mgb.wav”, etc. The Micro SD can have up to 26 Reels on it at any given time.
This was my first experience at making my own Reels for the Morphagene and I can’t wait to create more and experiment in the future. I have a ton of field recordings, songs, and random percussive sounds that I think could be great fun to work with. Click Here to download my Morphagene Reels,
Did you create anything after reading this or have any comments regarding the article? Feel free to get in touch!
